The records in a list window are by default sorted by a single column,
and this column is designated by an arrow ![]() . You
can sort the records in the list
window itself or by using the Table
Display Settings dialog.
. You
can sort the records in the list
window itself or by using the Table
Display Settings dialog.
You can set up a complex sort in which the records are sorted by one group and then by sub-groups within the top group. In the example below, the payroll deductions are sorted first by Type and then by Calculation Method within each Type.
 If at any time you want to restore
the display settings
to the system default, click the
If at any time you want to restore
the display settings
to the system default, click the  — Reset Display Settings to Default
— button in the upper right-hand toolbar.
— Reset Display Settings to Default
— button in the upper right-hand toolbar.
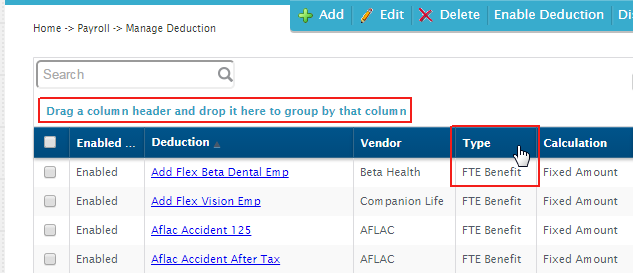
The items in a list can be grouped (sorted) using any of the fields (columns) in the list by dragging the column header and dropping it in the bar above the column headers.
Hover over the column
header you want to move until you see the hand pointer, then drag
it up underneath the Search field, and drop it. It may take a few
seconds to rearrange the list.
Repeat step 1 until
you have created all the groups with which you want to sort the list.
The example shows
a list sorted by two groups — type, then deduction.
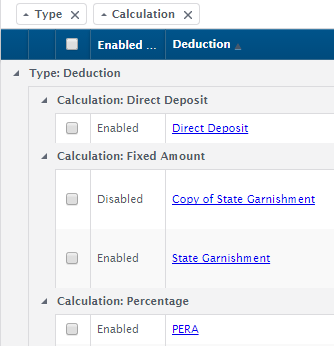
Change the ascending/descending sort order for each group by clicking the up or down arrow beside the group name — Type or Calculation in this example.
Remove a group by clicking the X beside the group name.
Change the sort order of the list by rearranging the group names. For example, this example is sorted by Type, then by Calculation. To sort by Calculation first, drag the Type "label" to the right of the Calculation "label".
To remove the groups
and restore the display settings to the system default, click
the Reset Display Settings to
Default button in the upper right-hand toolbar.
If you want to condense the data in a report sorted on two groups, use the Combine with Previous Group checkbox in Table Display Settings. The two column names will be displayed on the same row in the export file — Excel or PDF — followed by the detail lines included in the grouping.
Return to Navigation Overview
Click the Display Settings button  in the upper right-hand
toolbar. The Table
Display Settings window opens.
in the upper right-hand
toolbar. The Table
Display Settings window opens.
Check the box(es) for the group(s) you want to use to sort the list. Note: When sorting by more than one group, the list will be sorted in the order in which the groups appear in the list. For example, if you check the Type & Calculation boxes in the Group column in the example above, the list will be sorted by Type first, then by Calculation.
Click Save, and you'll be returned to the list window with the list sorted by the selected columns.
Refine the sort as desired using the instructions above.
To remove this sort, open the Table Display Settings window again, and uncheck the boxes in the Group column.
If you want to condense the data in a report sorted on two groups, use the Combine with Previous Group checkbox in Table Display Settings. The two column names will be displayed on the same row in the export file — Excel or PDF — followed by the detail lines included in the grouping.
Return to Navigation Overview
![]() Version
4.1 © 2022 - Harris School Solutions - All rights reserved
Version
4.1 © 2022 - Harris School Solutions - All rights reserved